
Shooting into the Sun at The Cobb
I Have a Confession
As a landscape photographer, I have to be prepared to shoot in a wide range of conditions. I like to think that I'm pretty adaptable and can deal with most things. However, there is one scenario that I have to admit to always trying to avoid.
The simple fact is that I don't like shooting straight into the sun. As my most common shooting times are dawn and dusk, this can be a problem at certain locations at certain times of the year. When the sun is just above the horizon at the start or the end of the day, it can be really tricky to control the exposure.
Many photographers get around this issue by bracketing their exposures, but I'm not one for spending much time on post-processing. So when Lee Filters announced they had released a Reverse ND Filter I thought this might be the perfect way help me control my exposures in those situations that I had previously avoided.
Some Bad News

A Super Stopper should not look like this.
Before I start to share with you my initial experiences with the reverse ND grad, I have some bad news about one of my other filters. I'm very sorry to report that Lee Filters Super Stopper has been shattered. The purchase of the reverse ND grad was my 11th Lee filter, so I decided that I would remove the Super Stopper from my filter pouch to make room for the reverse ND grad.
Unfortunately, the Super Stopper appears to have received a knock at some point and shattered. This is the first Lee filter I have lost due to damage. I'm not sure how this has happened. I keep all my filters in a Lee Filters pouch which is then kept in a heavily padded area of my bag. Still, something has happened and the Supper Stopper is no more.
RIP Super Stopper.
One of my Super Stopper images. It was featured in Outdoor Photography magazine (issue August 2017).
The Reverse ND Grad
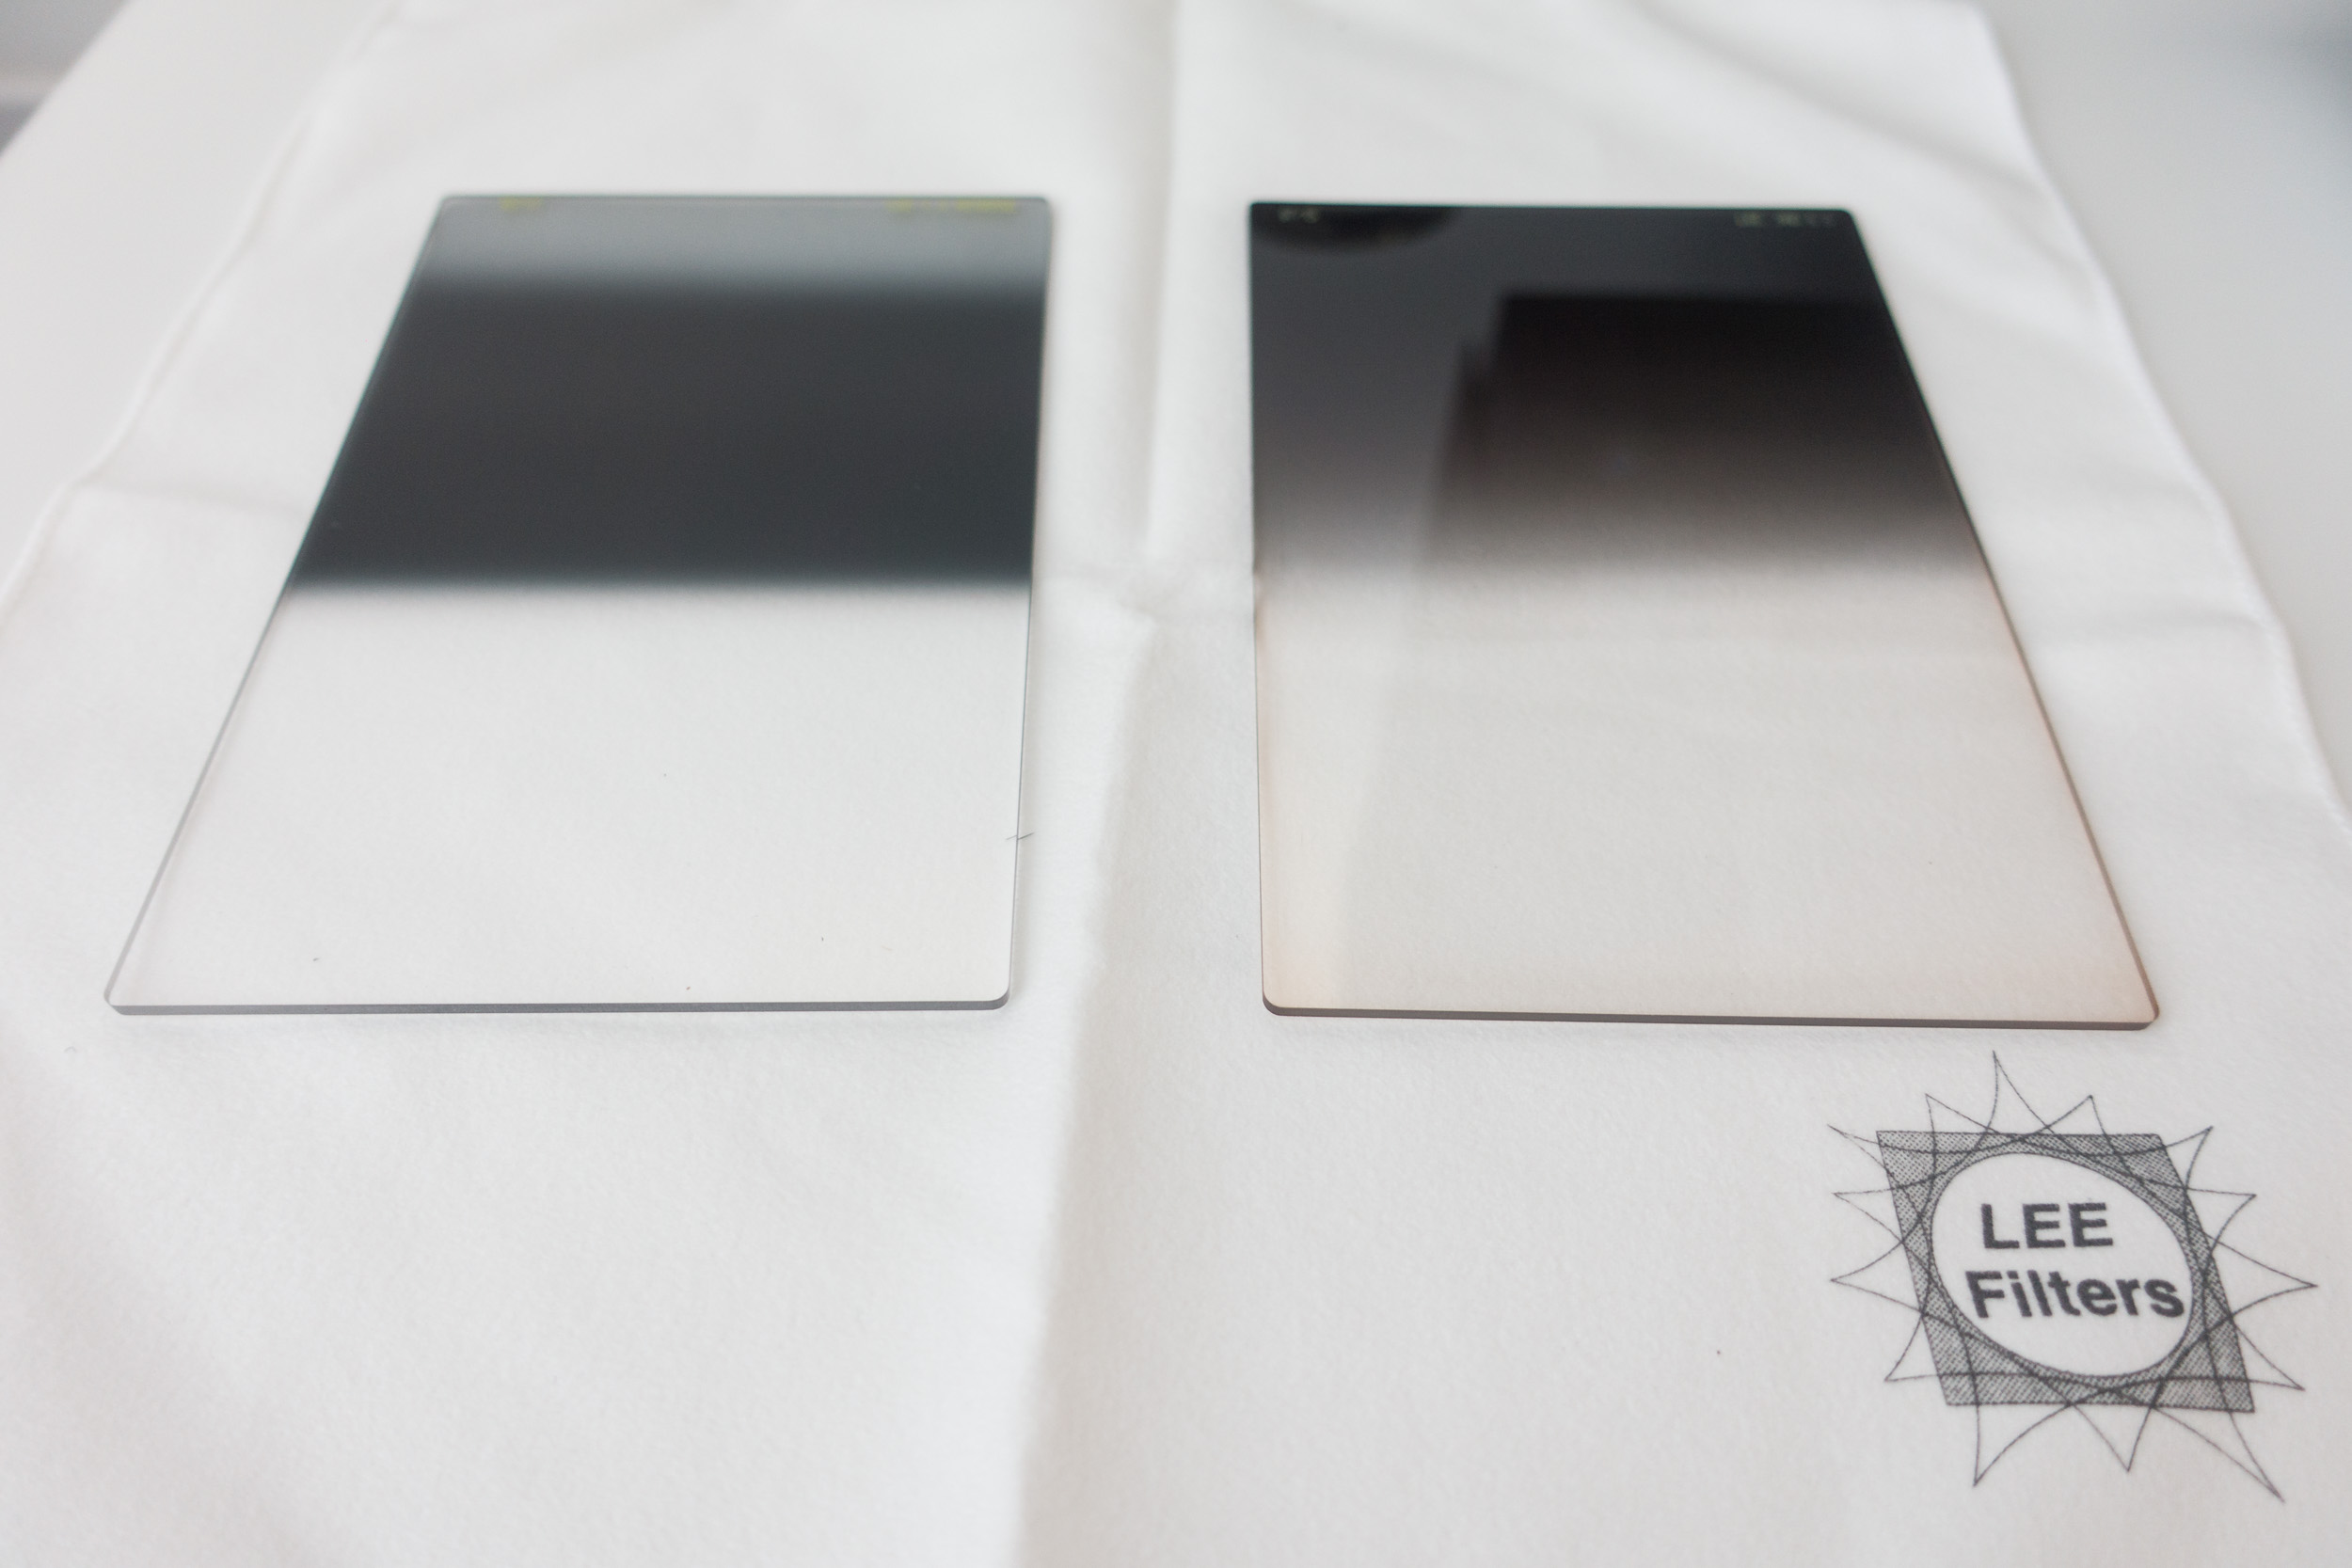
Reverse ND on the left and standard ND grad on the right.
Some of you may be asking what on earth is a reverse ND grad. Perhaps the best way to tell you is to show you.
As you can see from the image above, a standard ND grad is darker at the top and gradually gets lighter the further down the filter you get. However, with the reverse ND grad, the darkest area starts in the middle of the filter, and it gradually gets lighter towards the top of the filter. This allows you to place the darkest area of the filter where you need it most, just above the horizon where the sun is.
At The Cobb
I had been looking for the right location and waiting for the right conditions to try out my 4 stop reverse ND grad for a few weeks. Finally, an opportunity presented itself one morning at The Cobb in Lyme Regis, Dorset. I often wait for January time to visit The Cobb as this is the best time for the rising sun to illuminate the side of this stone pier. However, with clear skies forecast and the sun rising from the end of The Cobb I thought this would be the time to try my new filter.
The light was pretty flat at the start of the sunrise that morning. As I waited for the sun to pop over the horizon I spent a bit of time talking to the 3 other photographers that were also there that morning. As always, I very much enjoy having a chat to my fellow togs. One of those photographers was Anna Stowe. she has a wonderful portfolio of images and I would strongly recommend you follow her Facebook page.
When the sun did rise though I immediately added the 4 stop reverse ND grad to the polariser that was already on the camera. Here are some of the images I took:


The reverse ND grad did exactly the job I wanted it to do. As I took each image I was checking the histogram and was happy not to see any blown highlights. One thing I have noticed is that I did shoot those images at 28mm, which is tighter than the recommend 24mm or wider that Lee Filters say the filter should be used at. This is probably the reason I did spot much graduation towards the top of the image. I will need to remember this next time I use it.
Like a lot of my filters, the reverse ND grad won't be used all the time but it is still a filter that I am very happy to have in my bag. Finally, I can have confidence that when I shoot into the sun I can capture as much of the dynamic range of the seen in a single frame and instantly see results on the back of my camera.
So have you tried the reverse ND grad yet? What technique do you use when shooting into the sun? Let me know in the comments below.